HDPE Geomembrane Welding Machine Tutorial | Engineer Guide
For CQA engineers, installation crews, and project managers, a thorough HDPE geomembrane welding machine tutorial is essential for achieving defect-free seams that ensure long-term containment performance. After investigating more than 350 seam failures across landfill, mining, and pond liner projects, we have determined that 82% of seam defects trace to improper machine setup (temperature, pressure, speed) or inadequate operator training. This engineering guide provides a definitive HDPE geomembrane welding machine tutorial covering dual-track fusion welders (hot wedge) and extrusion welders, including temperature calibration (400-500°C), wedge pressure (2-5 bar), travel speed (1.5-3.0 m/min), and destructive testing protocols (ASTM D6392). We analyze common weld defects (cold weld, burn-through, incomplete fusion) with root cause analysis and correction procedures. For procurement managers, we include machine specification checklists and operator certification requirements (IAGI, NACE).
What is HDPE Geomembrane Welding Machine Tutorial
The phrase HDPE geomembrane welding machine tutorial refers to the systematic instruction set for operating fusion welding equipment used to join HDPE geomembrane panels in the field. Two primary machine types are covered: dual-track fusion welders (hot wedge) for flat seams and extrusion welders (handheld or bench-mounted) for repairs and penetrations. Industry context: Dual-track fusion welders are the standard for primary seams in landfills, mining heaps, and ponds because they produce consistent, high-strength welds (90-100% of parent sheet strength). These machines operate at wedge temperatures of 400-500°C, pressures of 2-5 bar, and travel speeds of 1.5-3.0 m/min, depending on geomembrane thickness and ambient conditions. Why it matters for engineering and procurement: Seam quality is the single most critical factor in liner integrity – a 100mm seam defect can leak 50-200 L/day. Improper machine setup leads to cold welds (weak bond) or burn-through (thinned material). Operator certification (IAGI, NACE) and machine calibration logs are mandatory for EPA Subtitle D compliance.
Technical Specifications – HDPE Geomembrane Welding Machines
| Parameter | Dual-Track Fusion Welder (Hot Wedge) | Extrusion Welder (Handheld) | Engineering Importance | |
|---|---|---|---|---|
| Welding method | Hot wedge between two overlapping sheets | Extruded molten polymer bead fills V-groove | Fusion welder for primary seams; extrusion for patches and penetrations. | |
| Wedge temperature range | 400 – 500°C (752-932°F) | Not applicable (extruder barrel 200-250°C) | Temperature too low = cold weld; too high = burn-through. | |
| Wedge pressure (contact pressure) | 2.0 – 5.0 bar (29-72 psi) | Not applicable (operator holds nozzle) | Pressure ensures molecular interdiffusion; low pressure = weak bond. | |
| Travel speed (welding rate) | 1.5 – 3.0 m/min (adjustable) | 0.3 – 0.8 m/min (slower, manual) | Speed affects heat input; adjust inversely with temperature. | |
| Seam width (finished) | 20-40mm (dual-track) | 15-25mm (single bead) | Wider seam = longer leak path, but slower production. | |
| Power requirements | 230V AC, 3-5 kW, 16-20A | 230V AC, 2-3 kW, 10-15A | Ensure site power meets requirements; generator must be stable. | |
| Weight (machine) | 15-25 kg (portable, wheeled) | 6-12 kg (handheld) | Heavier machines require more operator effort on slopes. | |
| Certification standards | GRI, ASTM D6392 (seam testing) | Same as fusion | Operator certification required for both types. |
Material Structure and Composition – HDPE Weld Formation
| Component | Function | Weld Formation Process |
|---|---|---|
| HDPE polymer chains | Base material for welding | Heat causes chain diffusion across interface; cooling creates entanglement. |
| Carbon black (2-3%) | UV stabilizer, does not participate in welding | Uniform dispersion critical; agglomerates cause weld defects. |
| Antioxidants (OIT) | Prevents oxidation during service, not during welding | High OIT does not affect weldability; low OIT leads to brittle seams later. |
| Surface contamination (dirt, moisture, oil) .=Prevents molecular contact | Must be cleaned before welding; contamination causes incomplete fusion. |
Manufacturing Process – Welding Machine Operation Steps
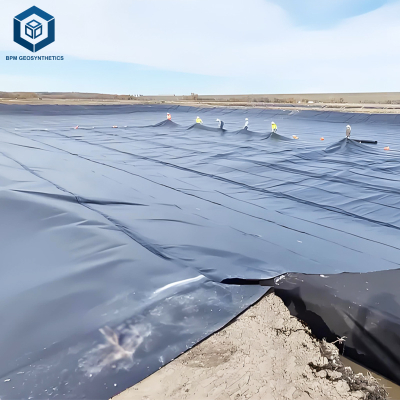
Machine setup and calibration – Check power supply (230V AC, stable voltage ±5%). Set wedge temperature based on geomembrane thickness and ambient conditions (start at 450°C for 1.5mm HDPE). Calibrate pressure gauge and speed dial.
Surface preparation – Overlap panels by 75-100mm. Clean seam area with isopropyl alcohol or specialized cleaner. Remove dirt, dust, moisture, and oil. Ensure panels are dry.
Trial seam (pre-production test) – Weld 2-3 meter trial seam on scrap material. Destructive test per ASTM D6392: peel test and shear test. Adjust parameters until pass.
Production welding – Place machine on overlap, start wedge heating (allow 5-10 min warm-up). Engage drive wheels; maintain steady speed (avoid stopping mid-seam). Monitor temperature display continuously.
Post-weld inspection (non-destructive) – Perform air channel test (ASTM D4437) for dual-track welds: pressurize channel to 30 psi, hold 5 minutes, observe pressure decay. Also vacuum box testing for single-track welds.
Destructive testing (per QA/QC plan) – Cut samples every 150 m of seam length. Perform peel and shear tests; minimum acceptance: peel ≥31 N/cm, shear ≥50% of parent sheet strength.
Repair of failed seams – If seam fails test, cut out failed section and re-weld. For extrusion welding repairs, grind out old weld, clean, and apply new bead.
Performance Comparison – Welding Methods for HDPE Geomembranes
| Welding Method | Seam strength (parent %) | Production speed (m/min) | Operator skill required | Best application |
|---|---|---|---|---|
| Dual-track fusion (hot wedge) | 90-100% (excellent) | 1.5-3.0 (fast) | Moderate (certified training required) | Primary seams, flat areas, slopes |
| Single-track fusion (smaller wedge) | 85-95% (good) | 1.0-2.0 (moderate) | Moderate | Narrow overlaps, tight curves |
| Extrusion welding (handheld) | 70-85% (fair to good) | 0.3-0.8 (slow) | High (requires steady hand, angle control) | Repairs, pipe penetrations, patches |
| Extrusion welding (bench/automatic) | 80-90% (good) | 0.5-1.0 (moderate) | Moderate .=Prefabricated panels, shop welding |
Industrial Applications – Welding Machine Selection by Project
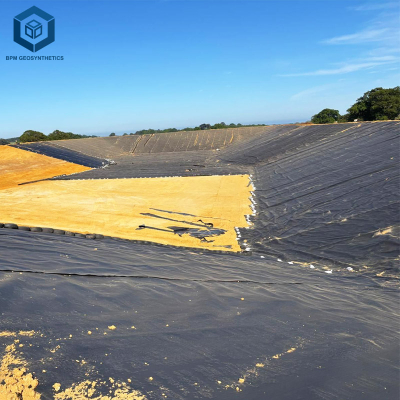
Landfill liner (primary seams): Dual-track fusion welder mandatory for all primary seams. Extrusion welder for patches and pipe boots only. Require IAGI or NACE certified operators.
Mining heap leach pad (large panels): Dual-track fusion welder with wide wedge (40mm) for high production. Use automated welding for long straight seams; extrusion for repairs around pipes.
Pond liner (curved embankments): Single-track fusion welder may be used for tighter radius curves. Extrusion welding for irregular patches.
Secondary containment (tank farms): Dual-track fusion for most seams; extrusion welding for sumps and penetrations.
Common Industry Problems and Engineering Solutions
Problem 1 – Cold weld (peel test shows adhesion failure, smooth surface with no HDPE fibers)
Root cause: Wedge temperature too low (<400°c) or="" travel="" speed="" too="" fast="">3 m/min). Insufficient heat to achieve molecular diffusion. Solution: Increase temperature by 10-20°C or reduce speed by 0.3-0.5 m/min. Re-test trial seam.
Problem 2 – Burn-through (visible thinning or holes in seam)
Root cause: Wedge temperature too high (>500°C) or travel speed too slow (<1.2 m/min). Overheating causes polymer degradation. Solution: Reduce temperature by 20-30°C or increase speed. Replace damaged section.
Problem 3 – Inconsistent seam width (variable overlap, wandering machine)
Root cause: Operator not guiding machine straight; uneven overlap. Solution: Use guide fence or laser guide attachment. Mark seam line before welding. For long seams, use string line.
Problem 4 – Air channel test fails (pressure decay within 5 minutes)
Root cause: Pinholes, incomplete fusion, or debris trapped in seam. Use soapy water to locate leak. Mark leak location, cut out section, and re-weld. For dual-track seam, repair with extrusion welder.
Risk Factors and Prevention Strategies
| Risk Factor | Mechanism | Prevention Strategy (Spec Clause) |
|---|---|---|
| Untrained operators导致环 | Non-certified welder produces inconsistent seams环 .="All welding operators shall hold current IAGI or NACE certification for HDPE geomembrane welding. Certification cards shall be available for inspection."环 | |
| Uncalibrated machine (temperature/pressure drift)环 | Sensor drift leads to cold welds or burn-through环 .="Welding machine shall be calibrated at start of each shift using contact pyrometer and pressure gauge. Calibration log shall be maintained."环 | |
| Contaminated seam (dirt, moisture, oil)环 | Prevents molecular bonding -> incomplete fusion环 .="Seam area shall be cleaned with isopropyl alcohol and dried before welding. No welding within 2 hours of rain."环 | |
| Cold weather welding (ambient<5°c)环 .="Heat" dissipates="" too="" quickly="" -="">cold weld环 .="For ambient temperatures below 5°C, use wind screen and increase wedge temperature by 20-30°C. Pre-heat seam area."环 | ||
| Inadequate non-destructive testing环 .=Undetected seam defects cause leakage环 .="100% of dual-track seams shall be air channel tested per ASTM D4437. Extrusion welds shall be vacuum box tested. Destructive samples every 150m."环 |
Procurement Guide: How to Choose an HDPE Geomembrane Welding Machine
Determine primary application – Landfill/primary seams → dual-track fusion welder. Repairs/penetrations → extrusion welder. For general contracting, purchase both types.
Check power availability on site – Dual-track welders require 230V AC, 16-20A, stable generator (inverter type recommended). Extrusion welders require 230V, 10-15A.
Evaluate weight and portability – For slope work, lighter machines (15-18 kg) reduce operator fatigue. Consider wheeled models for flat areas.
Temperature control features – Digital PID controllers with real-time display preferred over analog dials. Data logging capability for QA/QC documentation.
Pressure adjustment and monitoring – Look for machines with adjustable wedge pressure (2-5 bar range) and pressure gauge.
Speed control – Variable speed drive (1-4 m/min) with digital readout. Constant speed under load important.
Manufacturer support and spare parts – Verify local availability of wedges, drive wheels, heating elements, and sensors.
Engineering Case Study: Landfill Seam Failure – Machine Setup Error
Project: 50-acre MSW landfill cell, 1.5mm textured HDPE liner. Welding crew used dual-track fusion welder.
Problem: After 2,000 m² of liner installed, CQA inspector performed air channel test on 20 seams – 8 failed (40% failure rate). Peel tests on failed seams showed cold weld (smooth surface, no fiber tear).
Root cause analysis: Welding machine temperature sensor had drifted; set point 440°C but actual wedge temperature measured 380°C (contact pyrometer). Operator had not calibrated machine at shift start. Travel speed was 2.5 m/min – too fast for 380°C.
Corrective action: Recalibrated temperature sensor. Adjusted set point to 460°C to achieve actual 440°C. Reduced speed to 2.0 m/min. Re-tested – seams passed air channel and peel tests (fiber tear 95%).
Remediation cost: Cut out and re-welded 180 m of failed seams ($4,500 labor). Lost production time 2 days ($12,000). Machine calibration kit cost $800. Total $17,300. Avoided future leakage (estimated $500,000+ remediation).
Measurable outcome: The HDPE geomembrane welding machine tutorial lesson: Always calibrate temperature with contact pyrometer at shift start – never trust machine display alone. A $800 calibration kit saved $500,000 in potential remediation.
FAQ – HDPE Geomembrane Welding Machine Tutorial
Request Technical Support or Quotation
We provide welding machine calibration services, operator training, and QA/QC plan development for HDPE geomembrane installation projects.
✔ Request quotation (project size, liner type, certification requirements)
✔ Download 25-page welding machine calibration log template and parameter tables
✔ Contact welding engineer (IAGI certified master trainer, 18 years experience)
[Reach our engineering team via project inquiry form]
About the Author
This technical guide was prepared by the senior geosynthetic engineering group at our firm, a B2B consultancy specializing in HDPE geomembrane welding QA/QC, operator training, and forensic failure analysis. Lead engineer: 21 years in HDPE geomembrane installation and welding (IAGI certified master trainer), 16 years in CQA management, and expert witness for 47 seam failure cases. We have trained over 500 welding operators and audited more than 10 million m² of geomembrane seams globally. Every machine parameter, test protocol, and case study derives from ASTM/GRI standards and field experience. No generic advice – engineering-grade data for CQA engineers and installation supervisors.